
There’s a particular Saturday morning ritual that happens in neighborhoods across Orlando. Parents stand at kitchen windows, coffee growing cold in their hands, staring at their backyards with a mixture of hope and resignation. The grass is green enough. The fence is straight. Everything is… fine.
But fine doesn’t host the neighborhood barbecue. Fine doesn’t make your daughter’s friends ask if they can come over after school. Fine doesn’t turn a house into a home that people remember.
I’ve spent enough time in this industry to recognize that moment when someone realizes their backyard isn’t just underperforming — it’s actively working against the life they’re trying to build. And more often than not, the conversation that follows lands on one very specific question: “How complicated is this going to be?”
It’s a fair question. Because let’s be honest — when most people think about pool construction, they imagine months of chaos, surprise expenses, and that sinking feeling when a contractor says, “Well, we’ve hit a small complication.”
But here’s what changes the game entirely: fiberglass pool installation is fundamentally different. Not “slightly easier” different. Not “a few weeks faster” different. We’re talking about a process so streamlined that what takes traditional construction four to six months can happen in a matter of weeks.
And it starts with understanding six deceptively simple steps.
The Revolution Nobody Saw Coming
Before we dive into the process itself, you need to understand why fiberglass changed everything.
For decades, pool construction meant one thing: dig a hole, build a structure in that hole, hope nothing goes wrong. Concrete pools required skilled labor at every stage, endless weather delays, and a construction timeline that felt more like a pregnancy than a home improvement project. Vinyl liner pools offered speed but sacrificed durability and aesthetics.
Then fiberglass pools arrived and quietly rewrote the rules. Instead of building a pool on your property, manufacturers began perfecting pool shells in controlled factory environments — places where temperature, humidity, and quality control could be managed down to the millimeter. The result? A pre-engineered structure that arrives at your home essentially finished, requiring only installation rather than construction.
It’s the difference between building a car in your driveway versus having one delivered from a factory. Both get you a vehicle, but one involves exponentially less risk, time, and potential for things to go catastrophically wrong.
Step 1: Design and Site Assessment — Where Dreams Meet Dirt

Every installation begins the same way: with someone standing in their backyard, gesturing vaguely at empty space, saying something like, “We were thinking… maybe… here?”
This is the moment that separates premium pool companies from the rest. Because while anyone can drop a pool shell in a hole, the companies worth trusting understand that this step isn’t about pools at all — it’s about understanding how you actually live.
During site assessment, experienced installers aren’t just measuring your yard. They’re asking questions that might seem tangential: Where does the sun set? Which direction do prevailing winds come from? Where do your kids naturally congregate when they’re playing outside? How do you envision entertaining?
These details matter because a fiberglass pool installation isn’t just about placing an object in your yard — it’s about creating the gravitational center of your outdoor life. The technical work here involves soil analysis, utility location, drainage assessment, and access evaluation. But the real work is understanding whether your vision of weekend mornings by the water actually matches the reality of your property’s capabilities.
When companies like Aqua Elite Pools™ conduct this assessment, they’re building a complete picture: sun exposure for optimal heating efficiency, sight lines from your main living areas, proximity to outdoor kitchens or entertainment spaces you might add later, and crucially, how the installation equipment will actually access your backyard without demolishing your fence or crushing your neighbor’s prized azaleas.
By the end of this step, you should have clarity on three things: what’s possible, what’s optimal, and what it’s actually going to cost. No surprises later. No “unforeseen complications” that mysteriously inflate the budget mid-project.
Step 2: Excavation — When It Gets Real
There’s a peculiar moment that happens during excavation. You’ve signed the contracts, made the deposit, talked endlessly about what this will mean for your family. But it’s all been theoretical until the morning a excavator rolls into your driveway and you realize: this is actually happening.
Excavation is when fiberglass pool installation transitions from planning to reality. And here’s where the process reveals its first major advantage over traditional construction. For a concrete pool, excavation is just the beginning of a months-long building process.
For a fiberglass installation, excavation is already halfway to completion. That’s because your pool shell isn’t being built on-site — it’s already finished, waiting at a facility, ready for delivery the moment the hole is prepared.
The excavation process follows a detailed dig sheet that specifies exact dimensions: length, width, and depth, plus adequate overdig to accommodate plumbing, electrical, and the backfill material that will secure the shell. For a typical residential fiberglass pool, we’re talking about removing anywhere from 40 to 70 cubic yards of soil — roughly three to five full-size dump truck loads.
What makes this step surprisingly precise is that unlike concrete pool excavation (which allows for adjustments during the build process), fiberglass requires the hole to match the shell’s specifications almost exactly. Too shallow and the pool won’t sit properly. Too deep and you’re adding unnecessary backfill expense. Too wide and you’ve created settling problems that will haunt you for years.
Modern excavation contractors use laser levels and GPS-guided equipment to ensure the hole meets specifications within inches. The bottom is graded for drainage, compacted to prevent settling, and typically finished with a gravel base that provides both stability and drainage.
On average, excavation takes one to three days, depending on soil conditions, access constraints, and weather. In Florida’s sandy soils, excavation tends to be straightforward. In areas with heavy clay, rock, or high water tables, you might need additional engineering solutions — something a thorough site assessment should have identified during Step 1.
Step 3: Setting the Foundation — The Part Nobody Sees

If excavation is where things get real, foundation setting is where things get permanent.
This step involves creating a perfectly level, properly compacted base for your fiberglass pool shell to rest on. In most installations, this means spreading and compacting a gravel base — typically crushed stone or pea gravel — that provides both structural support and drainage.
The gravel serves multiple critical functions: it distributes the weight of the filled pool evenly across the bottom, prevents settling that could crack the shell or plumbing connections, allows groundwater to drain away rather than exerting pressure on the shell, and provides a forgiving surface that accommodates minor variations in the excavation.
Getting this right matters more than most homeowners realize. A fiberglass pool shell might weigh 8,000 to 15,000 pounds empty, but fill it with water and you’re looking at 80,000 to 150,000 pounds or more — the equivalent of parking several fully-loaded dump trucks in your backyard. That weight needs to be supported uniformly.
Professional installers use a combination of laser levels and manual measurements to ensure the gravel base is level within a quarter-inch across the entire pool footprint. They compact the gravel in layers, checking elevation repeatedly, adjusting as needed.
It’s tedious work. It’s invisible work once the pool is installed. And it’s absolutely critical work that separates installations that last decades from ones that develop problems within years.
This step typically takes one day, assuming weather cooperates. Rain can delay foundation work significantly because wet gravel doesn’t compact properly and wet soil can’t support equipment safely.
Step 4: Shell Delivery and Placement — The Day Your Neighbors Notice

If you want to understand the fundamental advantage of fiberglass pool installation, watch what happens on delivery day.
Somewhere between dawn and mid-morning, a specialized transport trailer arrives carrying your pool shell. If you’ve chosen a color — and modern fiberglass pools come in everything from classic blue to sophisticated gray to pearl white — this is when you see it for the first time at full scale.
The shell is lifted by crane and positioned above the excavated hole with precision that honestly seems impossible given that we’re talking about a structure that might be 30 feet long and weigh several tons. Experienced crane operators can position a fiberglass shell within inches of its target, lowering it gently into place while installers guide it with ropes and hand signals.
This is the Instagram moment of pool installation. This is when your daughter runs outside in her pajamas yelling, “It’s here! It’s actually here!” This is when neighbors suddenly remember they needed to borrow your ladder or check if you got their package delivery.
And this is when installing a fiberglass pool reveals its most dramatic advantage: what you’re looking at is essentially a finished pool. The surfaces are complete. The steps are built in. Any integrated features — benches, tanning ledges, spa areas — are already part of the structure. There’s no months-long wait for concrete to cure or finishes to be applied.
Once the shell is in the hole, installers use levels to ensure it’s positioned correctly — perfectly level side-to-side and front-to-back, at the correct elevation relative to the surrounding grade, properly oriented for plumbing connections and any planned decking or landscaping.
The entire delivery and placement process typically takes three to five hours, weather permitting. You’ll go to bed that night with a pool-shaped structure in your backyard, and the surreal realization that this thing is actually happening will keep you awake longer than you’d admit.
Step 5: Plumbing, Backfilling, and Initial Systems — The Technical Marathon
This is where fiberglass pool installation shifts from dramatic and photogenic to technical and precise. It’s also where proper execution separates amateur installations from professional ones.
The process happens in carefully coordinated stages. First, while the shell is empty or contains just a few inches of water for stability, installers connect the plumbing system. This includes the skimmer box that pulls surface debris into the filtration system, main drain suction fittings at the pool bottom, return jets that push filtered water back into the pool, and any additional features like dedicated spa jets, waterfall plumbing, or in-floor cleaning systems.
All of these connections must be waterproof, properly secured, and tested before being buried. A leak in a buried pipe is exponentially more expensive to fix than addressing the issue during installation.
While plumbing connections are being finalized, installers begin the backfilling process. Here’s where fiberglass installation requires particular expertise: backfill material is added around the pool shell in stages, while water is simultaneously added inside the shell to maintain equal pressure on both sides of the fiberglass.
Why does this matter? Because fiberglass, despite being incredibly strong when properly supported, can distort or even collapse if external pressure isn’t balanced by internal pressure during backfilling. The installation team fills the pool with a few feet of water, then backfills to that same level around the exterior. Add more water, add more backfill. Repeat until complete.
The backfill material itself — usually gravel for stability and drainage — is compacted as it’s added to prevent future settling. Any gaps between the shell and the excavated walls must be filled uniformly to provide even support and prevent voids that could cause the shell to shift or crack.
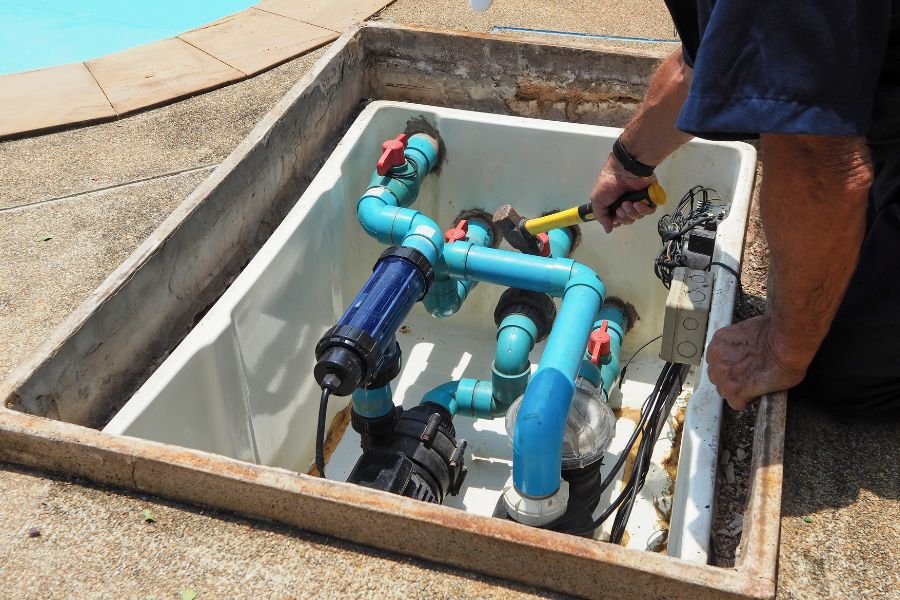
Simultaneously, electrical work is being completed for pool equipment: pump, filter, heater if included, lighting systems, automation controls if you’ve opted for smart pool technology, and any additional features like waterfalls or fire bowls.
Many premium installations include a groundwater access pipe (sometimes called a hydrostatic relief valve) which releases pressure if the water table rises above the pool bottom — critical in areas like Florida where seasonal water table fluctuations are normal.
This entire step takes two to three days on average, assuming no complications with underground utilities, weather delays, or supply chain issues with equipment.
Step 6: Coping, Decking, and Final Finishing — Creating the Complete Experience

The pool shell is in. The systems are connected. The backfilling is complete. At this point, you have a functional pool that could technically be filled and used.
But here’s what separates a hole filled with water from an outdoor living space that transforms your property: the finishing work.
Coping refers to the cap material that sits on top of the pool’s edge, creating a finished transition between the pool shell and surrounding deck. For fiberglass pools, coping options include natural stone like travertine or granite, precast concrete pavers designed specifically for pool edges, or poured concrete that can be stamped or stained to match your aesthetic preferences.
The coping serves multiple functional purposes: creates a gripping surface for swimmers entering or exiting the pool, prevents water from seeping behind the shell and eroding backfill, provides a visual frame that defines the pool’s perimeter, and sets the aesthetic tone for the entire space.
Decking is where the real design expression happens. While your neighbor might have stopped at basic concrete, premium installations incorporate materials that transform the pool area into a true outdoor living space: natural stone pavers that stay cool underfoot even in Florida summers, textured concrete that provides slip resistance while allowing for virtually unlimited color and pattern options, or composite decking materials that offer wood aesthetics without the maintenance.
The decking plan should account for drainage slopes that direct water away from the pool and house, adequate space for lounging, dining, and circulation, integration with any planned outdoor kitchens, fire features, or seating areas, and consideration for future landscaping.
Many installations also include at this stage: pool fencing for safety and code compliance, landscaping design that creates privacy and visual interest, LED lighting systems that transform the space at night, water features like deck jets or sheer descent waterfalls, and automation systems that let you control everything from your phone.
The finishing process typically takes one to two weeks, depending on the complexity of your decking plan and any additional features. When it’s complete, you’re looking at something that didn’t exist a few weeks ago: a complete outdoor living environment centered around water, light, and space designed specifically for how your family lives.
What This Actually Means: The Bigger Picture
Let me pull back for a moment and acknowledge something that might seem obvious but gets lost in the technical details: installing a fiberglass pool isn’t primarily about the pool itself.
It’s about deciding that the outdoor space you’ve been tolerating — the space that’s “fine” but not memorable — deserves the same attention you’ve given to your home’s interior. It’s about recognizing that your kids are going to be kids for a limited number of years, and creating the backyard that becomes their friends’ favorite destination matters more than you’d admit at a dinner party.
It’s about the Sunday morning when you realize your neighbors have stopped being people you wave to and started being people you actually spend time with, because your backyard has become the natural gathering place. It’s about property value and resale considerations, sure, but more fundamentally it’s about living well in the space you’ve worked hard to afford.
The reason fiberglass pool installation works so elegantly is that it removes the primary obstacle that stops people from acting on this realization: the chaos and uncertainty of traditional pool construction. When you know the process takes weeks instead of months, when you understand each step follows logically from the previous one, when you can actually visualize what’s going to happen and when, the decision becomes dramatically simpler.
The Decision That Matters
Here’s what I’ve learned after years in this industry: people don’t regret installing pools.
They regret waiting to install pools. They regret the summers that passed with their kids getting older, the gatherings they didn’t host, the memories they postponed. They regret believing that “someday” was a viable strategy, right up until they realized “someday” had quietly become “too late.”
The six steps of fiberglass pool installation I’ve outlined here aren’t complicated. They’re logical, proven, and surprisingly fast. The real complexity isn’t in the process — it’s in the decision to begin.
If you’re standing at your kitchen window on a Saturday morning, coffee going cold, looking at a backyard that’s “fine” but not what you dreamed about, you already know what needs to happen. The question isn’t whether to do this. The question is when you’ll stop researching and start living.
Because somewhere in Orlando, in a neighborhood very much like yours, there’s a family swimming in a pool that didn’t exist six weeks ago. Their kids’ friends are there. The neighbors wandered over. Someone’s grilling. Music’s playing. The sound of running water and laughter fills the air.
That family made a decision. They stopped waiting for perfect timing or complete certainty. They chose to create the space where their life could actually happen. The process that got them there? Six simple steps. Professional expertise. A few weeks of focused work.
The result? The backyard they should have had all along.
Ready to Transform Your Backyard?
If you’re in the Orlando area and serious about understanding what a professionally installed fiberglass pool could mean for your property, Aqua Elite Pools™ offers consultations that go beyond basic estimates. We assess your specific site, discuss your vision, and provide transparent information about process, timeline, and investment — no pressure, no surprises, just clarity about what’s possible.
Because the best time to install your pool was five years ago. The second best time is now.